Kitchen · 9 min read

How to Clean an Oven

Learn how to clean oven racks, interior surfaces, and door glass, with guidance for manual, steam-clean, and self-cleaning ovens.

By Long Island Maids · December 19, 2025
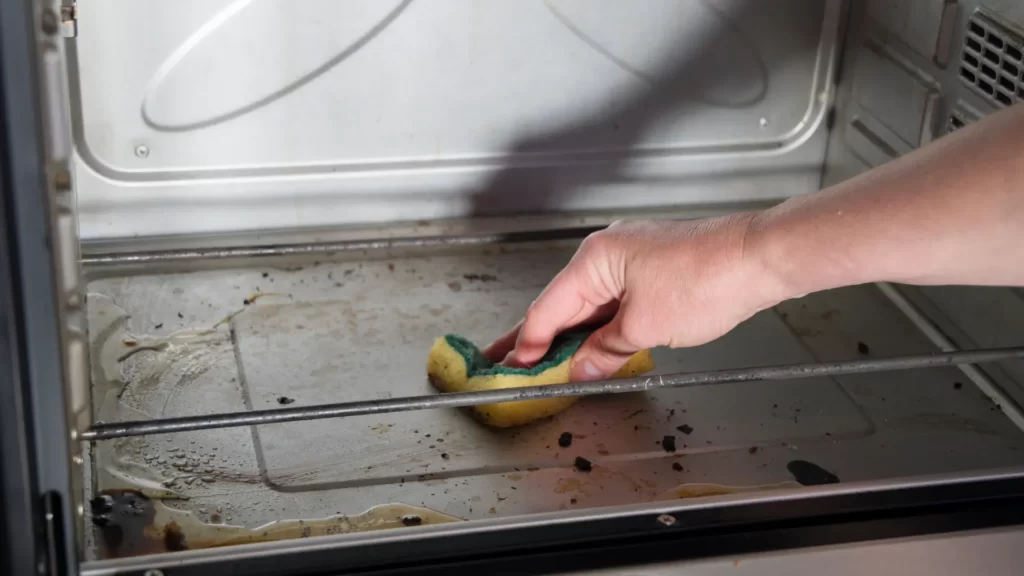
Clean oven interior after proper cleaning

Start with a cool oven and check its manual. Remove loose debris and clean removable parts and permitted surfaces with a compatible method. Follow the appliance and product instructions for rinsing, ventilation, and when the oven can be used again.

In This Guide

How you clean your oven depends on what type you have. Some ovens support self-cleaning cycles, others have steam-clean modes, and many require manual cleaning only. Using the wrong method or incompatible products can damage the interior coating or leave unsafe residue. This guide helps you identify what your oven permits and clean it safely.

Before You Start: Identify Your Oven and Permitted Method

Check your oven's user manual or look for cleaning mode labels on the control panel. Your oven falls into one of these categories:

  • Manual clean only — No automated cleaning feature. Clean by hand with compatible products.
  • Self-cleaning — High-temperature cycle (around 880°F) that burns residue to ash. No chemical cleaners permitted.
  • Steam clean — Lower-temperature cycle using water to loosen grime. Faster but less intensive than self-clean.
  • Special coatings — Some ovens have catalytic liners or enamel coatings with specific cleaning restrictions.
Method When Appropriate Key Restrictions
Manual Any oven; light to moderate soil Use products approved for your coating
Self-clean Ovens with this feature; heavy buildup No chemical cleaners; remove most racks
Steam clean Ovens with this feature; light soil Add water per instructions; not for heavy buildup

Your manual takes precedence. Generic cleaning advice may not apply to your specific model. If your manual prohibits certain cleaners or methods, follow those restrictions even if other sources suggest otherwise.

1. Prepare the Oven and Surrounding Area

  • Wait for the oven to cool completely. Never clean a hot oven—surfaces can cause burns and cleaners may react dangerously on hot metal.
  • Turn the oven off and confirm it will stay off during manual cleaning.
  • Open windows or turn on ventilation if using any cleaning products.
  • Protect the floor below the oven door with old towels or newspaper to catch drips.
  • Keep children and pets away from cleaning products and the oven area.

Gather only what you need for your method:

  • Manual cleaning: Non-scratch sponge, cloths, dish soap, approved oven cleaner (if needed)
  • DIY approach: Baking soda, water, white vinegar, spray bottle
  • Steam clean: Water (amount specified in your manual)
  • Self-clean: Nothing—remove all contents and let the cycle run

2. Remove and Clean Oven Racks

Rack materials, coatings, and sliding mechanisms affect what cleaning method you can use. Check your manual—not all racks can be soaked, scrubbed with abrasives, or left inside during automated cycles.

General guidance from GE Appliances:

  • Self-clean safe racks (often gray or porcelain-coated) may stay in during the cycle
  • Stainless steel or chrome racks must be removed before self-cleaning
  • Racks may remain during steam-clean cycles

To clean racks manually:

  • 1. Remove racks and place in a large sink or bathtub
  • 2. Line the basin with old towels to prevent scratching
  • 3. Fill with hot water and add dish soap
  • 4. Soak for several hours or overnight for heavy buildup
  • 5. Scrub with a non-scratch pad, rinse, and dry completely before replacing

Avoid abrasive scrubbers on coated racks or racks with sliding glide mechanisms—these can damage the coating and affect how smoothly racks move.

3. Remove Loose Debris

Before applying any cleaner, remove loose food particles and crumbs from accessible surfaces.

  • Use a damp cloth or paper towels to wipe up loose debris
  • For stuck-on pieces, let them soften with a damp cloth before gently removing
  • Dispose of debris rather than pushing it into corners or vents

Do not scrape heating elements, gas burner openings, or temperature sensors. These components are fragile. If debris is stuck to them, consult your manual or a technician.

4. Clean the Oven Interior

Choose the approach that matches your oven type and the level of soil.

For Light Soil (Routine Maintenance)

Mild soap and water work for regular light cleaning:

  • Mix dish soap with warm water
  • Wipe interior walls, ceiling, and floor with a damp cloth or non-scratch sponge
  • Rinse with a clean damp cloth
  • Dry thoroughly before using the oven

For Moderate Buildup (Baking Soda Method)

A baking soda paste can help loosen baked-on residue without harsh chemicals:

  • 1. Mix ½ cup baking soda with 2–3 tablespoons water to form a spreadable paste
  • 2. Apply to interior surfaces, avoiding heating elements
  • 3. Let sit for several hours or overnight
  • 4. Spray lightly with white vinegar to help lift the paste
  • 5. Wipe away with damp cloths, rinsing repeatedly until residue is gone

This method is generally compatible with standard oven interiors, but check your manual. Some manufacturers, including GE, recommend this approach for manual-clean ovens.

For Heavy Buildup (Commercial Oven Cleaner)

Commercial oven cleaners dissolve grease effectively but have important restrictions:

  • Read the product label for application time, ventilation requirements, and surfaces to avoid
  • Wear gloves and ensure adequate ventilation
  • Rinse thoroughly—multiple times—before using the oven

Important Safety Warnings

  • Do not use commercial oven cleaner in self-cleaning ovens unless the manufacturer explicitly permits it. Most prohibit this.
  • Never mix oven cleaner with bleach, vinegar, or ammonia. This can create toxic fumes.
  • Do not spray cleaner on heating elements, gas openings, or door seals.

5. Clean Door Glass and Accessible Door Surfaces

The oven door glass gets splattered but is more fragile than it appears.

  • Use a glass cleaner or the baking soda paste on the interior glass
  • Wipe with a soft cloth—avoid abrasive pads that can scratch
  • Clean the outer glass and door frame with appropriate surface cleaner
  • Wipe down the door handle and control panel with a damp cloth

Do not disassemble the door to clean between glass panels unless your manual provides specific instructions for your model. This is an advanced procedure that can break seals or misalign components.

6. Remove Residue and Reassemble

  • Wipe all surfaces with clean, damp cloths until no cleaner residue remains
  • Pay attention to corners and seams where product can collect
  • Let the interior dry completely
  • Replace racks once they're completely dry
  • Remove protective coverings from the floor

If you used a commercial cleaner, follow its instructions for how long to wait before using the oven. Some require running an empty heating cycle first.

Using Steam-Clean or Self-Clean Modes

These automated cycles work differently and have different requirements. Follow your specific model's instructions—the details below are general guidance only.

Steam Clean

  • Works at lower temperatures using water vapor to loosen light grime
  • Add water to the oven floor per your manual's instructions (typically 1 cup)
  • Racks and pans may typically remain inside
  • Cycle lasts approximately 30 minutes
  • Wipe loosened residue with a cloth after the cycle completes and oven cools

Self-Clean

  • Heats to approximately 880°F (471°C) to burn food residue to ash
  • Remove racks unless they're specifically labeled self-clean safe
  • Remove all cookware, foil, and loose debris
  • Ensure good ventilation—the cycle produces smoke and strong odors
  • Cycle takes 1.5–3 hours depending on settings
  • Door locks automatically during the cycle and unlocks after cooling
  • Wipe out ash with a damp cloth once completely cool

Do not leave home during a self-clean cycle. The extreme heat can cause smoke or, in rare cases, damage components. Be present and monitor for any problems.

Do not combine methods: Never apply chemical cleaners before running a self-clean cycle. The extreme heat can cause dangerous reactions with chemical residue.

When to Stop and Seek Help

Some situations are beyond routine cleaning:

  • Damaged heating elements, door seals, or interior coating
  • Contamination between glass door panels requiring disassembly
  • Abnormal smells, smoke, or sounds during normal operation
  • Self-clean cycle that won't complete or unlock

Maintenance and Common Mistakes

Regular habits reduce how often you need intensive cleaning:

  • Wipe spills when safe — Once the oven cools enough to touch safely, wipe up fresh spills before they bake on.
  • Use appropriate cookware — Dishes that are the right size reduce overflow.
  • Clean exteriors weekly — A quick wipe of the door and controls prevents grimy buildup.

Mistakes to Avoid

  • Cleaning while hot. Wait until completely cool to avoid burns and chemical reactions.
  • Using incompatible cleaners. Check your manual—especially for self-cleaning ovens.
  • Mixing cleaning products. Never combine different cleaners, especially those containing bleach or ammonia.
  • Scrubbing door seals or coatings. Abrasive cleaning damages these protective surfaces.
  • Leaving cleaner residue. Rinse thoroughly—residue can smoke or produce fumes when heated.
  • Assuming all racks tolerate self-clean. Check before running the cycle.
  • Covering the oven floor with foil. Most manufacturers prohibit this—it can affect heating and damage the coating.

Quick Checklist

  • Identified oven type and permitted methods
  • Oven cool and off
  • Racks removed (if required) and cleaned
  • Loose debris removed
  • Interior cleaned with appropriate method
  • Door glass cleaned
  • All residue removed
  • Racks replaced, area cleaned up

Oven cleaning is part of a larger kitchen-cleaning routine. For the full process—from clearing counters to mopping floors—see our step-by-step kitchen cleaning guide.

Professional deep cleaning services typically focus on accessible kitchen surfaces rather than oven interiors, which require specialized approaches depending on the appliance type.